Photo Project: Painting with light

One of the best things about having an SLR camera is the absolute flexibility it gives in getting creative with your shots. Sure, the more advance prosumer cameras on the market today are almost equalling the slr camera in terms of functionality and even quality, but still, with the added bonus of changing lenses to suit your photographic needs, the slr still can't be beat.

Just now, I embarked on another of my photography projects. This time, it has to do with painting with light. The term "painting with light" basically means leaving the shutter open for long periods and then, using some light source, make patterns or shapes that are eventually captured on the camera sensor.

I must admit, this is my first serious attempt at this, and let's just say it is going to be something that I may well be coming back to time and again. The possibilities are just endless, only being limited by your creativity - or perhaps your artistic ability.

What's needed for this shot: Shutter release (though not essential if your exposures are less than 30s as you can use your camera's timer to release the shutter), a torchlight, and a flash.

Here's how I did it:
  1. I framed the shot with the lights on, and focused.
  2. Dial in the camera settings: 30s at f/19.
  3. I pictured in my mind's eye what I planned to draw and switched off the lights.
  4. Give some time for your eyes to adjust to the darkness (mine was almost complete darkness), and then trip the shutter.
  5. Start drawing, switching off your torch at the end of every completed shape.
  6. Fire your flash.
And after all that, you should get something like this:


ISO100, f/19, 30s, flash fired with test button

Enjoy experimenting!
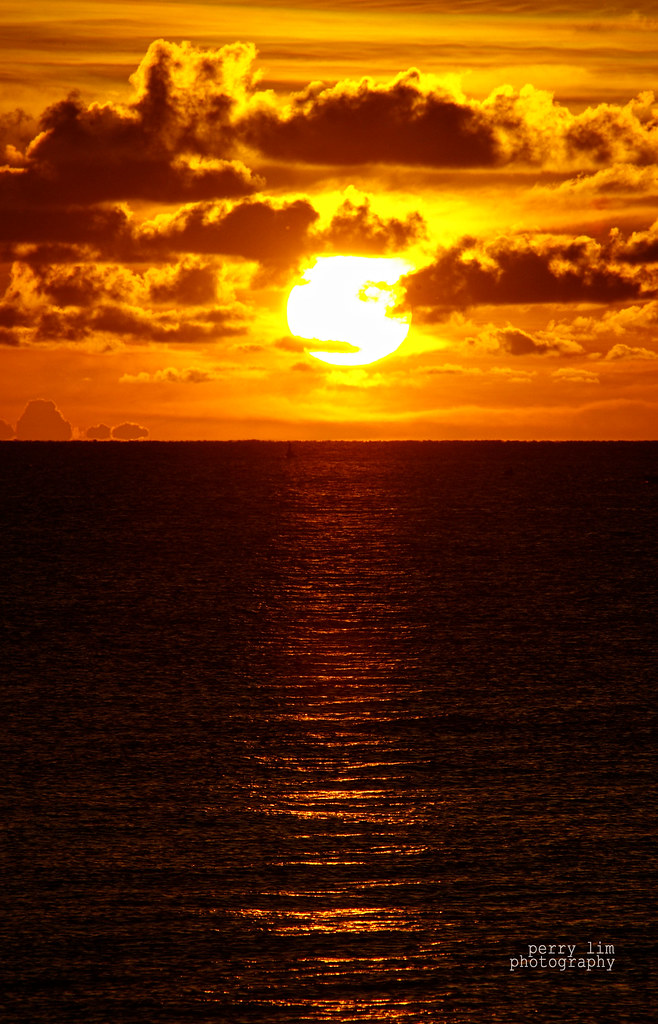
Photographing sunsets


I absolutely love sunsets, especially beautiful sunsets. And in a place like Kota Kinabalu, there's no shortage of them throughout the year. So, for us here, or in Malaysia for that matter, a very popular subject for photography is sunsets.

One thing I've noticed about sunsets is that I've never seen any two sunsets alike. Every time, when it's time for the sun to go down, the sky turns a different hue , and every time, it's unlike any that I've ever seen. I don't assume to have seen every single setting sun here, but the ones that I have seen are just that - each unique in their own way.

But, the trouble about capturing sunsets with your camera is that it is quite tricky to get the right exposure. You see a gorgeous scene unfolding right before you, you take your camera but what comes out is far short of the beauty you saw just moments before. So, what do you do? A few quick tips:

1. Bracket your shots - Most dslrs nowadays have automatic bracketing (where you set your camera to take the same shot with different exposures). This almost guarantees that one of the shots will be close to what you actually see.

2. Get stable - Use a tripod. Sure, it's still very bright and you may handhold your camera furing those times when the sun is still above the horizon, but once it dips, it can dark pretty quickly. So, keep your tripod handy and use it during that time because the colours as the sky gets dark can be equally spectacular.

3. Change your white balance - Instead of leaving your white balance on auto, try setting it to shade or cloudy. What this does is that it will make your shots warmer, recreating that wonderful golden hue the sun gives during this "magical hour".

Hopefully, with those tips you'll get to capture those gorgeous sunsets on camera just like you saw them with your very own eyes.


1/180s, f/19, Aperture Priority

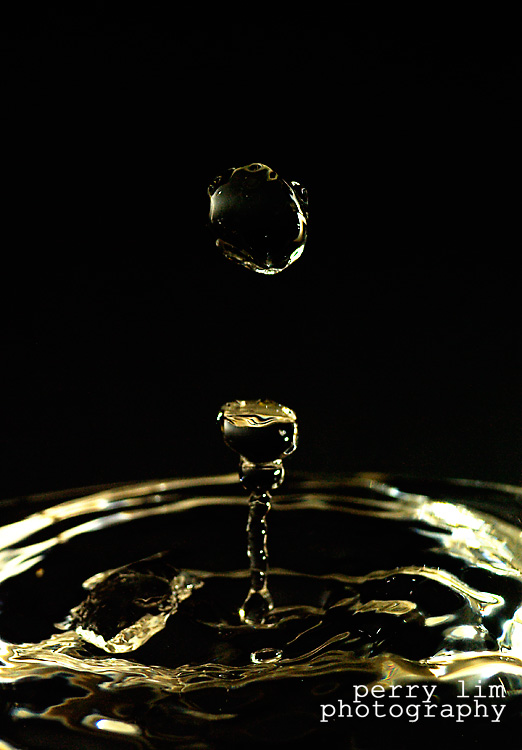
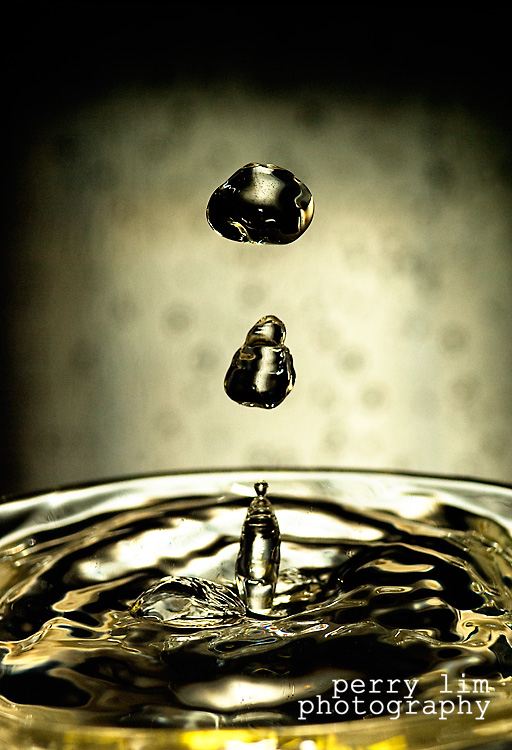
Photo Project: Water Sculptures

Okay. After getting the jolt of inspiration from the website I told you about in my previous post, I decided to try my hand at something I've never done before. I know that this kind of thing has been done to the death by many others, and probably with much better results. The only thing I can say is, this is my take on a very popular theme.

The setup took some time as I couldn't decide which lens to use, which flash power setting to use, what aperture to use, and what shutter speed to use (this is my first time at this sort of thing, remember?). Anyway, once that was sorted out, then came the toughest part: timing.

I'm not sure how many shots I took, but I can say that it was a lot! But, the end result was worth every bit of patience. For the backgrounds that you see in the photos, they were merely plastic folders, blue and black.

If you decide to try this yourself, here's a tip: make sure your room is a bit dim. It allows you to see the flash better and you can actually tell whether you got the shot or not. It also helps you in getting your timing right.

Here are the fruits of my labour. This are the best picks of the bunch in my opinion.

Hope you enjoy them!


Flash fired straight on


Flash fired straight on


Flash fired at 90 degrees right


Flash fired straight on

All photos were shot using the following setup:
Flash @ 1/128 power, 70-300 with extension tubes at f/16, 1/180 shutter speed.

Inspiration

Yes, I know...

I've neglected this blog for almost half a year now. But, there's good reason (two good reasons, actually!) now to update it:

Number 1
I've been thinking about changing the whole look of this blog so that it looks more, er, 'presentable'. I found the previous template a bit too plain, and I find this new one much more appealing to my taste. But, as you can see with all the empty links around the page, I'm still in the midst of resurrecting this whole site. So, bear with me.

Number 2
I've recently acquired a couple of those ebay flash triggers and I've begun experimenting a bit more with flash photography. I've been reading up quite a bit on this and a good resource is the website Strobist. There are tons of information on that website and the best thing is that they're all for free. Head on there if you haven't already done so, and you might just learn more than a thing or two about lighting.

Using some of the knowledge gained, I actually did a self portrait yesterday with a two-light set up and I must say I was quite pleased with the results. However, I'm not posting it up here cos the picture's a bit too embarrassing for the whole world to see. I wasn't exactly dressed up properly for the whole experiment.

Number 3
From the said Strobist website, I got to know about another photographer, Dustin Diaz, and I'm inspired. He's currently doing a 365 project and so far, all his photos look just great. And in case you want to replicate his technique, he's got all the information you're going to need to set up just like he did - complete with diagrams!

So, here's to a new beginning for this blog, and a rush of new wonderful ideas and photography.


Shooting data: 0.5s, f/22, ISO100
 
ss_blog_claim=5b747ea34e513b121a74ecf8c956234f